Tuesday, December 20, 2011

Honey Sweetened Peanut Butter Fudge


I have had a hankering for peanut butter fudge for a long time.  I searched high and low for a legal recipe--on the internet, in my sugar-free cookbooks, etc to no avail! The one that came the closest was a maple syrup recipe that I wasn't that thrilled with.  So last night, I decided to just make up my own see what I could come up with! I obviously wanted a recipe that would be legal and tasty.  I have succeeded and am now sharing just to prove that sugar-free living can be healthy AND tasty, too!! ;)


Peanut Butter Fudge
1 cup of honey
1/2 cup (1 stick) butter
1 cup peanut butter
1 tsp vanilla

Heat honey and butter to boiling.  Reduce heat to medium-low and simmer until butter is melted.  When butter is melted simmer/boil for 5 minutes.  Stir in peanut butter and cook for a few more minutes, mostly until the PB is melted and thoroughly incorporated.  Remove from heat, add vanilla and stir.  Butter an 8"x8" dish and pour mix in.  Refrigerate for several hours.  Cut into 1" squares and ENJOY! :)

Monday, December 12, 2011

Gluten-Free Christmas "Sugar" Cookies


Ever since we started the sugar-free and gluten-free way if eating, I have missed the tradition of rolling out sugar cookies and cutting them out in Christmas-y shapes.  Last year I came across The Food Lovers' Primal Palates' Grain-free Gingerbread Cookie recipe and somewhat satisfied my desire for cut-out cookies.  This year with the discovery of gluten-free pie crust I came to the realization that it just MIGHT be possible to make cookies very similar to what I grew up with.  So I pulled out the old sugar cookie recipe out and looked it over, and came up with this recipe! It's fantastic! I can't wait to eat more of them! :D

What you will need:

3/4 cup of butter (1 1/2 sticks), softened
1/2 cup (4 oz) of cream cheese, softened
1 egg
1/2 cup of honey
1 tsp vanilla

4 cups of Pastry Flour Blend, divided
1 1/2 tsp xanthan gum
1/4 tsp salt
1/4 tsp baking powder
1 tsp baking soda
1 tsp cream of tarter


Making the Dough:

Cream together butter and cream cheese together.  Add egg, honey and vanilla.  Cream.

In separate bowl, mix dry ingredients together.

Add dry ingredients mixture to the butter mixture and mix together, kneading at the end.  Divide into 4 balls or discs and refrigerate for at least two hours.

Baking:
Preheat oven to 350.

Roll out dough to desired thickness (I like between 1/8"-1/4").  Cut with cutter[s] of your choice, place on baking sheet and bake for 6-8 minutes.  These bake fast, so keep an eye on the first batch ;)
If you want, you can also frost these.  We like these best cold, so we keep them in the fridge.

Frosting:
1 stick of butter, softened
2 Tablespoons of maple syrup
1/4 cup raw honey
Pinch of salt
Splash of vanilla

Cream ingredients together and spread on cookies.

Peppermint Frosting variation:
Add 1/4-1/2 teaspoon (depending on taste) peppermint extract (you may want to add a bit more honey if you use the full 1/2 tsp).

ENJOY!! :)

Thursday, September 22, 2011

Gluten-Free Naturally Sweetened Apple Crisp


With fall comes real apples! I'm not talking the waxed and polished things you can get in the grocery store all year round (of course you can make this with those, too--it just won't be as tasty)! We go to a local farm that sells fresh produce to get our apples and you just can not even compare them to the grocery store apples! 


Gluten-Free Naturally Sweetened Apple Crisp

What you'll need:

About 10 medium size apples
3/4 cup of butter (1 stick and a half)
1 cup of brown rice flour (or other flour of your choice)
1 Tblsp cinnamon plus extra for sprinkling on the apples
1 1/2 cups oatmeal
1/3 cup of honey

Apples:
Preheat oven to 350.  Wash, peel, core and slice your apples into a casserole or baking dish (I use a glass 13"x9").  Grease your pan with butter.  Layer the apples in and as you get one layer in, give a nice sprinkling of cinnamon on each layer.

Topping:
Melt the butter.  Mix dry ingredients.  Add honey and melted butter.  Mix well and spread/drop on cinnamon sprinkled apples.  Bake for 45-60 minutes.  Top with whipped cream or just eat and ENJOY!


Monday, September 19, 2011

Chocolate Bean Cake with Peanut Butter Frosting


This recipe started out as Healthy Indulgence's recipe, but I've tweaked it enough to our needs and tastes that I think that I can safely call it my own version. 

My recipe makes a very thin 4 layer cake.  The layers are wafer-like and rather "fudgey" when refrigerated! It is DELICIOUS! People will never believe when you tell them what it is--unless of course you're weird like me--then people really WILL believe you that you made a cake out of black BEANS! ;)

What you'll need:
2 - 15 ounce cans of plain black beans or (3 cups cooked beans)
1 1/4 cups of Passionate Homemaking's Flaxseed Egg Substitute (you'll need to double her recipe, at least--see below note on using eggs)
2 teaspoons vanilla
1 teaspoon sea salt
3/4 cup butter (12T)
2/3 cup honey
3/4 cup unsweetened cocoa powder
2 teaspoons aluminum-free baking powder
1 teaspoon baking soda


Preheat oven to 325.  Drain and rinse your beans off.  Put your beans, egg substitute, vanilla and salt in blender or food processor.  Mix very well, stopping to scrape the sides--remember you want the beans to be completely non-bean-like ;)!


In small bowl: mix cocoa powder, baking soda and baking powder.
In large bowl: Cream butter and honey together.

Add bean mixture to butter mix and combine.  Add cocoa mixture and mix well.


Grease a 9" round cake pan (or heart shaped pan, like I use :)).  Dust it with cocoa powder.  Place parchment paper in the bottom.  Divide the batter between your pans and bake for 35-45 minutes--it's going to depend on your pan and oven.  A toothpick is not going to come out "clean" from this, but it will not be really-really gooey. 


Note on using eggs: if you wish to use 10 eggs instead of the flaxseed binder, you can, BUT it is going to be much puffier so you'll probably want to halve the recipe and do a 2 layer

 Peanut Butter Frosting
1 cup butter (softened)
1 cup honey
1 cup peanut butter
1/4 teaspoon salt

Whip ingredients together and spread on completely cooled cake (works best to refrigerate the layers).


After you have frosted the cake, refrigerate it for at least 12 hours (overnight or a couple days is best).  You CAN eat it right away, but it is beyond compare when it is refrigerated!! This is very RICH so ENJOY it with a glass of milk or cup of coffee! ;) You can also easily halve the recipe for a 2 layer cake.


Honey-Sweetened Whipped Cream

I thought that I would give my whipped cream recipe it's own post so that it would be easier to find.


Whipped Cream
1 pint heavy whipping cream (organic and raw is best)
1 tablespoon honey (raw is best)
pinch of salt
splash of vanilla

Whip cream and rest of ingredients together until desired consistency.  Eat straight or top a tasty dessert with it! ;) ENJOY!

Wednesday, September 14, 2011

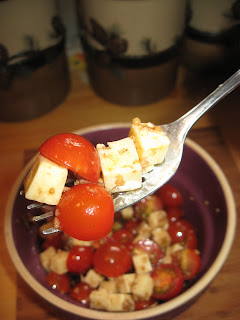
Balsamic Cherry Tomatoes and Cheese Cubes


This recipe was inspired by my sister, but I made some changes to accommodate my tastes and what I had on hand.  This is my version:

 Balsamic Cherry Tomatoes and Cheese Cubes

 Wash your tomatoes off and de-stem them if needed. 


 Cut the tomatoes in half (my sister quartered her's).


Then cube up some cheese (I used cheddar and my sister used curds).


Then throw in some minced garlic (Sis used garlic powder).


Now add salt, balsamic vinegar and olive oil to suit your taste (and proportions).  Mix up and ENJOY!


Monday, August 8, 2011

Enjoying Summer!

Hello friends,

I am just enjoying summer and not motivated or inspired to blog in the slightest at the moment :) I hope all of your summers are going splendidly and are all well!  The reason I am blogging in the first place is to post a recipe for a friend who asked for it :) So enjoy if you so desire.

Gluten-Free Naturally Sweetened Chocolate Chip Strawberry Shortcake

Chocolate Chip Cookies or Bars (they're also really good on their own)
1 cup (2 sticks) butter, melted or softened
1/2 cup of honey
2 eggs
1 tsp vanilla
1 tsp baking soda
1 tsp salt
2 cups brown rice flour
2 cups of chocolate chips (I use 90% Lindt dark chocolate chopped in my food processor)

Preheat oven to 350.  Cream together honey and butter (or mix if you'd melted the butter).  Beat in eggs and vanilla.  Combine dry ingredients (minus chocolate) in small bowl.  Add to butter mixture.  Fold in chocolate.  Drop onto a greased cookie sheet or spread the whole batch out on a greased 16"x10.5" jellyroll pan.  Bake for 12-15 minutes.

Strawberries
1lb strawberries (organic is best)

Hull and chop strawberries to desired chunkiness.

Whipped Cream
1 pint heavy whipping cream (organic and raw is best)
1 tablespoon honey (raw is best)
pinch of salt
splash of vanilla

Whip cream and rest of ingredients together until desired consistency.

Combine together in order that you like.  For instance; I like: cookies first, then strawberries, then finally cream but DH likes cookies, cream, strawberries ;)).  To each his/her own!

ENJOY!

Monday, March 14, 2011

Wheat-Free Chicken and Biscuits

I have not perfected the portions (as far as gravy to biscuits) yet, so you may have to tweak them a little.

What you'll need:

Gravy:

9 tablespoons butter
6 tablespoons potato starch (or other thickener)
3 cups milk
3 cups chicken broth
6 teaspoons of garlic powder
salt and pepper to taste

8 cutlet chicken breasts (3 or 4 regular breasts) or whatever part of the chicken you'd like to use

Biscuits:
3 cups flour (garbanzo bean flour makes a really good biscuit)
3/4 teaspoon salt
6 teaspoons baking powder
3/4 teaspoon cream of tarter
3/4 cup lard (butter probably would work)
1 cup milk

Cook chicken. I prefer to just cook it in some lard in the pan I make the gravy in, but you could bake it, too. Set aside.

Make biscuits. Preheat oven to 425F. Mix dry ingredients together and then cut in lard. Add milk and mix. Form biscuits, put on baking sheet and bake for 12-20 minutes.

Cut up chicken into bite sized pieces.

Melt butter over medium heat (be careful not to burn the butter). Stir in potato starch/thickener. Whisk in milk and broth. Whisk frequently until thickened and hot. Add chicken.

Place biscuit on plate and ladle chicken and gravy over it! Add a vegetable (we like green beans!) and ENJOY! :)

Wednesday, March 2, 2011

Cinnamuffins: AKA Snickerdoodle Muffins


These muffins I nicknamed Snickerdoodle muffins, because they remind me of the snickerdoodle cookies that I used to make as a pre/young teenager. These are very easy to make up and we make them regularly.

What you'll need:
1/4 cup olive or coconut oil
1/2 cup maple syrup
1 cup applesauce

1 1/2 cups brown rice flour (or whatever your favorite flour is)
1/2 tsp. soda
1 1/2 tsp. baking powder
1 tsp. cinnamon
1/2 tsp. salt

1/2 cup raisins

What to do:
Preheat oven to 375F degrees.

In medium bowl, mix oil, syrup and applesauce together:In small bowl, mix dry ingredients (excluding raisins):
Add dry ingredients to wet mixture and mix slightly. Add raisins:
Mix well:
Grease muffin tins (I like to use butter wrappers that I save in my fridge). Fill tins up:

Bake for 18-20 minutes:Let cool for 5-10 minutes, then take out and let cool on a wire rack (or if you can't resist, grab one and slice it in half and slather butter over it! ;))

ENJOY!

Friday, February 25, 2011

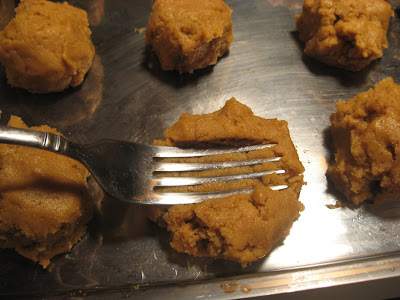
Peanut Butter Cookies


These cookies are a fairly recent addition to our "regular havin's", but they are SOOOO yummy!!

What you will need:

1/2 cup butter, melted
1 1/4 cups peanut butter
1 tsp vanilla
1/3 cup honey
1/2 cup applesauce
3 eggs
1 Tbsp olive oil

2 1/2 cups brown rice flour (or whatever flour you'd like to use)
1 tsp baking powder
1/2 tsp of cream of tarter
1/2 tsp of salt
2 tsp baking soda

What to do:
Preheat oven to 350F

Put liquid ingredients in a bowl

Cream together

Add dry ingredients

Mix until combined

Make into balls and place on cookie sheet

Then criss-cross with a fork


Bake for 11 minutes (makes about 2 dozen cookies, total)

ENJOY!! :)

Wednesday, February 16, 2011

'Garlic Lovers' Garlic Knots

This is new recipe that I just came up with. We used to get these awesome garlic knots at a restaurant that we used to go to every other week. We stopped going because we started avoiding wheat and that's pretty hard to do in an Italian restaurant! Tim and I got talking about them one day and how much we missed them and then I said, "well, duh! I could make them!!" So I did and here's the result!

For this recipe I'll be using a Chebe breadsticks mix, but you can use whatever breadstick/dough recipe that you want.

You will need:
  • Chebe mix or other dough recipe
  • About 1 cup of olive oil
  • 1/2 cup minced garlic
Here's how:

First, pre-heat your oven to whatever your dough recipe calls for--375 if you're using Chebe mix.

Then take a measuring cup and put about 1/2 cup or so of minced garlic in.


Then take your olive oil and fill it to the 1 cup line. Stir it and set it aside.

Now make your dough. Take your completed dough ball and divide it into 12 equal balls. Roll them into a strip and then tie them in a knot and place them on a baking sheet. Make sure to use a pan with a lip around the edge. ;)


Throw in the oven for about 15 minutes (this will again depend on your recipe). Pull them out and drizzle your olive oil and garlic over them. This will kind of happen in two stages; you'll drizzle the olive oil first and then kind of 'plop' the garlic on. If your meat (or whatever you're eating these with) is done you can eat them right away, if its not, turn off your oven and throw them back in the oven until the rest of the meal is done.


ENJOY!!

Tuesday, February 8, 2011

Roast Potatoes

Here's a very tasty side dish! We especially like it with seasoned chicken. Enjoy!

Set your oven to 400F.

Grab about 12-14 potatoes (less if you're using Russets).

Wash them off and cube them up and put them in a large bowl.


Pour 3/4 cup of olive oil on top. Put 1/2 cup of minced garlic in.


Add 3 teaspoons (1 tablespoon) or salt and 4 tablespoons of Italian seasoning. Mix well.


Throw it in a 13"x9" pan (a jelly-roll pan works, too)


Put pan in oven and bake for 60-90 minutes.


These are a little on the "rare" side of things, I like them a bit browner, but to each her own ;) Enjoy!

Monday, February 7, 2011

What Would YOU Like To See?

Well, I think as soon as I finish the post on mama cloth, we will have finally come to the last installment of the Disposable to Reusable series. What would you like to hear next? I have a few ideas, but not all that many so I'm open to suggestions! ;) I will be expanding on reenacting themes and projects and maybe some specific food themes (i.e. why we don't eat wheat, soy, etc.), and doing an intro to NRT (Nutrition Response Testing) and journaling our journey towards better and better health.

So please comment! :)

Friday, February 4, 2011

Comments

"Anonymous" commenting is now open. :)

Tuesday, February 1, 2011

Sick

I realize that I haven't blogged in quite some time. I have been sick. For those of you who do/are familar with NRT (Nutrition Response Testing), it's cellular parasites that are affecting me (and actually, eating rye, too)! Blagh. Hopefully, now that I've gotten my supplements adjusted I'll be able to finish up my posts on Disposable to Reusable.

Friday, January 21, 2011

What We Ate This Week 1/14-1/21

Friday:
Breakfast: Pancakes (brown rice flour) with real maple syrup and Nature's Place uncured bacon
Lunch: French fries (we were out shopping and this was a "tide-over" kind of meal!)
Dinner: Smoked pork chops from The Market Place, seasoned mashed potatoes and brussel sprouts (w/organic butter)

Saturday:
Breakfast: Eggs from our chickens, Jones' sausage links.
Lunch: Leftover roast potatoes
Dinner: Sirloin steak (broiled), macaroni and cheese (noodles, goat milk, cheese), kale sauted in butter and garlic
Evening Snack: Chocolate cookies (gluten-free, sweetened with applesauce and juice) and organic decaf coffee

Sunday:
Breakfast: Nature's Place uncured bacon, eggs
Lunch: leftovers from Sunday's supper
Dinner: Pizza (Chebe' mix, Price Chopper organic garlic pasta sauce on Tim and N's half, cheddar cheese, Hormel Natural Choice pepperoni, calamata olives, Italian sausage from The Market Place)
Evening Snack: Chocolate cookies (gluten-free, sweetened with applesauce and juice) and organic decaf coffee

Monday:
Breakfast: Jones' sausage links, eggs, and Landsberg rye bread (imported from Germany)
Lunch: leftover pizza
Afternoon snack: Handful of fresh cherries
Late afternoon snack: 6 dried cherries (no sugar added) and two squares of Lindt 90% dark chocolate
Dinner: Italian sausage, Chebe breadsticks (dipped in olive oil with Italian seasoning, garlic powder and salt), oven roasted cauliflower and broccoli (cauli and brocs mixed with olive oil and McCormick's Montreal Steak seasoning)
Evening Snack: Chocolate cookies (gluten-free, sweetened with applesauce and juice) and organic decaf coffee

Tuesday:
Breakfast: Jones' sausage roll, eggs, and Landsberg rye bread (imported from Germany)
Lunch: I can't remember! :P
Dinner: Smoked pork chops, garlic mashed potatoes and brussel sprouts
Evening Snack: Chocolate cookies (gluten-free, sweetened with applesauce and juice) and organic decaf coffee

Wednesday:
Breakfast: Cubed up potatoes fried in bacon grease seasoned with salt, garlic powder and Italian seasoning
Lunch: Rye Finn Crisp crackers, cheddar cheese, and green beans with butter, salt and garlic powder
Afternoon snack: 6 dried cherries (no sugar added) and two squares of Lindt 90% dark chocolate
Dinner: Chicken breasts (seasoned with garlic powder, salt, Italian seasoning and a titch of paprika), bread sticks (dipped in oil, etc) and spinach with butter and apple-cider vinegar.
Evening Snack: Honey-Nutmeg-Raisin cookies (gluten-free, sweetened with honey and raisins) and organic decaf coffee

Thursday:
Breakfast: Nature's Place uncured bacon, Bob's Red Mill Mighty Tasty Cereal with butter and maple syrup or raw honey
Lunch: Leftover chicken and organic carrots. Honey-Nutmeg-Raisin gluten-free cookie for dessert
Snack: cherries and chocolate
Dinner: Eye round beef roast, gravy (thickened with potato starch), mashed potatoes, and cauliflower
Evening Snack: Honey-Nutmeg-Raisin cookies (gluten-free, sweetened with honey and raisins) and organic decaf coffee

Saturday, January 15, 2011

'About Me' Tab

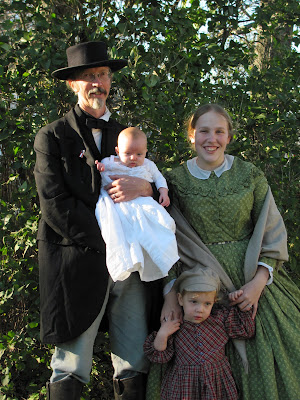
Old Mill Village Reenactment - October 2010

I've added an "About Me" tab on the blog.

Wednesday, January 12, 2011

2011 Anti-Winter Dreariness Sewing List

Since we have entered the post-Christmas/New Year winter dreariness, I thought I should have some 'Anti-Winter Dreariness' sewing projects so after I finish some modern sewing, I will attack this.
  • Finish toile - this will require some help (oh Mumsy....?)as the shoulder is bunching pretty badly and I need someone to smooth it up.
  • Put pocket in side seam and hooks or button on wool skirt
  • Wool bodice - can't finish or even start this until I have my toile done
  • Velvet belt
  • More Collars
  • Remake collar that's shown in picture above -- I forgot to chop the seam allowance off of it.
  • Fancy over-hoop petticoat based on this petti from the MET. (click for bigger picture)
Mom, Em, and Stasia need:
  • Corded bonnet for each of them
  • Corded stays for Em
  • Wool dress for Mom
  • Re-fit Mom's work dress
  • De-farb Mom's straw bonnet
  • 2 drawers for Mom
  • 2 chemises for Mom
  • Pettis for Mom
  • Probably drawers and chemise(s) for Em

Tuesday, January 11, 2011

Cloth Diapering with Thirsties Covers and GMD Yellow-edge Prefolds

Jenny P. asked, "Did you/do you use any of the larger sizes as well, or are the smalls really that versitile? They say they're good to 15lb. How do they work in the "real world"?"

As mentioned in my previous post on cloth diapering, I use Thirsties covers and Green Mountain Diaper Cloth-eez Prefolds. This is how they work for us:

This picture is showing an X-Small (NB) Thirsties wrap (green-right hand side)--the back of the prefold is folded under to fit the wrap.

The red is a size small. The prefold doesn't need to be folded under anymore.

Here is the Medium (orange) and Large (yellow) covers with the same small, yellow-edge prefolds:

I hope that gives a good visual. It's much cheaper to do it this way. I've used my prefolds for 2 1/2 years straight (that's washing and drying over 100 times!) and they are only now just starting to show signs of use. I highly recommend them.